 +1 (774)478-6704
 Order@premiumonebackdrops.com


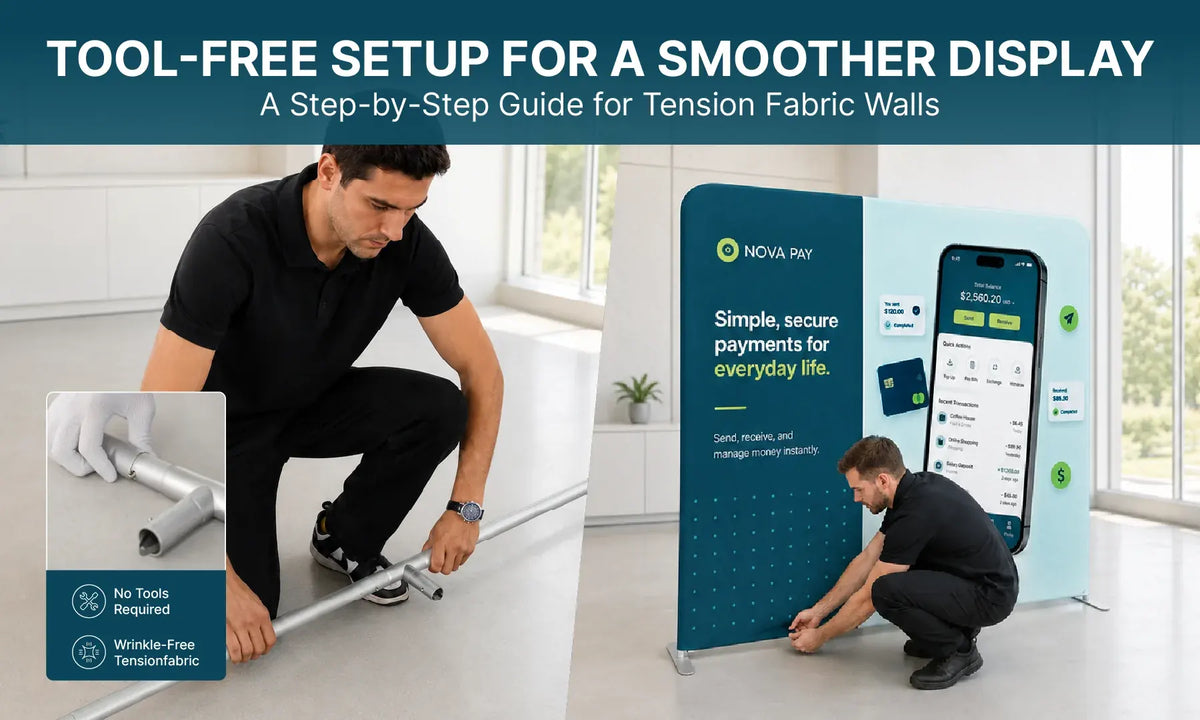
A tension fabric wall should create a smooth, professional background that keeps attention on your brand. However, even a wrinkle-resistant fabric graphic can look uneven when the frame is not fully connected, the cover is installed off-center, or the display has been packed carelessly between events.
Many setup-related wrinkles can be reduced without specialized equipment. A correctly assembled frame provides the tension needed to stretch the pillowcase-style graphic across the structure. When the frame, fabric, seams, and bottom closure are aligned properly, the wall can achieve a cleaner appearance without drills, hammers, or other installation tools.
This guide explains the tool-free setup process, the most common causes of visible creases, and how to remove and store the graphic more carefully after an event.
This guide applies primarily to tube-frame tension fabric walls that use a pillowcase-style graphic and bottom zipper. Curved, shaped, dimensional, or model-specific displays may use a different frame sequence or graphic closure, so always review the instructions supplied with the exact product.
Quick answer: Connect and lock the complete frame first. Center the pillowcase graphic over the top corners, pull both sides down evenly, align the seams with the frame edges, and close the bottom zipper without forcing it. Most setup-related wrinkles come from incomplete frame connections, twisted fabric, or uneven alignment.
How a Tension Fabric Wall Creates a Smooth Finish
A standard tube-frame tension fabric display normally combines two main parts:
- A lightweight frame made from connected tube sections
- A stretch fabric graphic made to fit the exact frame size and shape
The graphic works like a fitted pillowcase. It slides over the assembled frame and is secured at the bottom on models that use a zipper closure. The completed frame stretches the fabric across the surface and helps reduce loose areas and minor packing lines.
Both parts must work together. A correctly printed graphic cannot sit smoothly on a frame that is incomplete or uneven. A correctly assembled frame also cannot correct a cover that is upside down, twisted, or pulled lower on one side.
The Straight Tension Fabric Backdrop Display is an example of the tube-frame and pillowcase-style structure covered in this guide.
What to Check Before Setup
Choose a clean area with enough room to lay out the frame without stepping on the graphic. Keep food, drinks, dirty packaging, pens, and sharp objects away from the printed fabric.
Before starting, confirm that you have:
- All numbered or matching frame sections
- The correct bases, feet, and model-specific connectors
- The printed pillowcase-style fabric graphic
- The carrying bag or case when included with the selected product
- A clean protective sheet when the graphic must be placed on the floor
Use clean, dry hands when handling the graphic. A second person is recommended for larger wall sizes because two installers can guide the cover down more evenly.
Step-by-Step Tool-Free Setup Guide
Step 1: Sort the Frame Sections
Lay the tubes on the floor in approximately the same shape as the finished wall. Match any numbers, letters, directional labels, or connector shapes before joining the sections.
Check the tube openings and connectors for dirt, packaging material, or visible damage. Preparing the full layout first reduces the chance of forcing the wrong sections together.
Step 2: Connect and Lock the Frame Tubes
Join the matching sections and insert each tube until the push button or connector locks completely. Confirm that every button is visible, the joints have no unusual gaps, and the complete frame follows the intended shape.
A partially connected tube can shorten one side of the frame and create loose areas or diagonal tension lines across the graphic.
Step 3: Install the Bases
Secure the bases or feet according to the instructions for the selected model. When the display uses hand-operated knobs, tighten them evenly without overtightening.
Stand the uncovered frame upright briefly. It should appear level and stable. When it leans or looks uneven, return it to the floor and check the connections before adding the fabric.
Step 4: Confirm the Graphic Orientation
Identify the front, back, top, and bottom of the graphic. Check the logo direction, zipper position, seams, labels, and any printed side panels.
For double-sided graphics, decide which design should face the main aisle. For curved or shaped models, confirm which seam follows each frame edge.
Step 5: Slide the Graphic Over the Frame
Start at the top and place the pillowcase graphic over both upper corners. Pull the fabric downward gradually, alternating between the left and right sides.
Do not pull one side completely down before adjusting the other. This can twist the cover and move the seams onto the visible graphic surface.
For a larger wall, one installer should guide each side. Use open hands and avoid pulling forcefully on one corner, seam, or zipper area.
Step 6: Align the Seams and Corners
Before securing the bottom, inspect the wall from the front and sides. The seams should follow the frame edges, the top corners should sit at a similar height, and the main logo or headline should appear level.
Gently lift or slide the fabric into position when adjustment is needed. It is easier to correct the alignment before the graphic reaches full tension.
Step 7: Close the Bottom Zipper Evenly
On models using a bottom zipper, bring the two lower edges together without placing excessive pressure on the closure. Move the zipper steadily and make sure the fabric is not caught in the teeth.
Stop when the zipper becomes unusually difficult to move. This may indicate that a frame tube is incomplete, the graphic is twisted, the orientation is incorrect, or one side has been pulled lower than the other.
Correct the setup instead of forcing the zipper.
Step 8: Complete the Final Check
Move the finished display into position and inspect it from several feet away. Check the logo, headline, seams, bottom edge, and overall frame.
Use clean, open hands to smooth minor creases toward the nearest edge. Allow the fabric time to settle over the assembled structure.
Do not immediately use an iron or high-temperature steamer. Printed fabrics, seams, and zippers may react differently to heat. Only apply heat when the care instructions for the exact graphic specifically allow it.

Common Causes of Wrinkles and How to Fix Them
Tension fabric graphics are designed to create a smooth presentation, but wrinkle-resistant does not mean that creases can never appear. Most problems can be traced to the frame connection, graphic position, or previous storage.
The Frame Is Not Fully Connected
A partially connected tube changes the intended dimensions of the wall. This can make the graphic loose in one area and overly tight in another.
Release or remove the cover, reconnect every tube until it locks, and confirm that the bare frame stands level before reinstalling the graphic.
The Fabric Is Off-Center
When one side is pulled lower than the other, diagonal lines may appear across the front. Open the bottom closure, release some tension, and reposition the cover until the top corners and side seams are balanced.
The Graphic Is Twisted
The graphic may rotate slightly when one side is pulled faster. The logo can appear slanted and a seam may move onto the visible front.
Do not continue closing the zipper. Lift the cover slightly, return the seams to the frame edges, and pull both sides down together.
The Zipper Tension Is Uneven
Wrinkles may collect near one lower corner when the bottom is closed before both sides are balanced. Reopen the zipper, align the bottom edges, and close it gradually without pulling on one corner.
The Graphic Was Stored Under Pressure
Deep folds may form when the fabric is compressed beneath frame parts or packed while damp. Minor packing lines may reduce after correct installation, but strong creases can require more time and may not disappear immediately.

A Safe Troubleshooting Order
When wrinkles remain visible, check the display in this order:
- Confirm that the frame stands level.
- Check that every tube is completely locked.
- Release the bottom zipper or closure.
- Center the top of the graphic.
- Align both side seams with the frame.
- Pull the left and right sides down evenly.
- Close the bottom without forcing it.
- Inspect the display from the front and sides.
Do not spray the printed graphic with water at the venue unless the product instructions permit it. Avoid adhesives, safety pins, clips, or sharp objects that could damage the print or fabric.
How to Remove and Pack the Fabric
Good preparation for the next event begins during dismantling.
Clean your hands and make sure the surrounding floor is clear. Open the zipper completely before lifting the graphic. Do not drag the zipper area over a frame corner or pull one side upward while the other remains secured.
For larger walls, two people should lift the cover evenly. After removal, check the graphic for dirt, moisture, tears, or seam damage.
Pack the fabric only when it is completely dry. Fold it loosely instead of repeatedly pressing the same printed area into a sharp crease. Keep heavy frame sections and sharp hardware away from the folded graphic.
Fabric Care and Storage Between Events
Cleaning requirements vary according to the fabric, printing method, stitching, zipper, and product construction. Do not assume that every printed tension fabric graphic can be machine washed, dry-cleaned, ironed, or steamed in the same way.
The Canadian Conservation Institute’s guide to caring for textiles and costumes emphasizes preventive care, careful handling, and protection from environmental conditions that can damage textiles.
The Smithsonian Institution’s textile storage guidance recommends keeping stored textiles in a clean, cool, dry area and avoiding locations with major changes in temperature and humidity.
These resources focus on museum, heritage, and antique textiles rather than commercial printed event graphics. Their general handling principles are still useful, but the instructions supplied for the specific printed graphic should take priority.
Between events:
- Make sure the graphic is completely dry
- Keep it away from liquids, dust, food, and sharp hardware
- Avoid placing heavy objects on top of the fabric
- Store the carrying bag in a clean, dry indoor area
- Inspect the seams and zipper before the next event
- Complete a practice setup before an important show
Frequently Asked Questions
Do tension fabric walls require installation tools?
Many standard tube-frame models use push-button or snap-lock connections and can be assembled without tools. Always check the instructions for the exact model before setup.
Why does my tension fabric wall still have wrinkles?
Common causes include an incomplete frame connection, an off-center graphic, twisted fabric, or uneven zipper tension. Release the cover and correct the frame and seam alignment instead of pulling harder on one corner.
Can I use a steamer on the fabric graphic?
Only use a steamer when the care instructions for the exact fabric and printing method specifically allow it. Correct the frame connection and graphic alignment first.
Should one person or two people install the wall?
One person may manage a compact wall, but two installers are recommended for larger sizes because they can guide both sides of the graphic down more evenly.
Can I wash a tension fabric wall graphic?
Washability depends on the fabric, print process, stitching, and supplied care instructions. Do not machine wash or dry-clean the graphic unless the instructions for the specific product confirm that the method is suitable.
A Smooth Display Starts with Correct Setup
A professional tension fabric wall does not depend on complicated equipment. It depends on completing each basic step correctly.
Match the frame sections, lock every connector, center the graphic, align the seams, and close the bottom evenly. When wrinkles appear, check the frame and fabric position before trying heat, moisture, or improvised fixes.
Careful removal and storage are equally important. A clean, dry graphic that is packed without heavy pressure will be easier to prepare for the next event.
Explore our Tension Fabric Wall Collection to compare straight, curved, shaped, and dimensional fabric displays for portable event branding.
Need help identifying your frame, replacement graphic, or correct setup process? Contact the POB team with your product link, size, order information, and a photo of the display for more accurate assistance.